Home Cookies index contact ThisThat Image Map

Tuesday, March 29, 2011

The Cookies That Almost Killed Me!!!

Most times I look at a request to do a cookie I've never done before as a challenge, and an opportunity to learn something new, to grow.

NOT THIS TIME!!!

These had me thinking...."What on earth was I thinking!!!!'
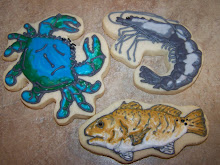
These are the cookies that almost killed me!   At first request, I thought, OK, not too bad, a little more detailed, but not too bad.
I don't want to even remember how many hours went into making these. Don't get me
wrong, I like the end result.  It's the process of getting there that was a doozie!


After 24 of them, I got a little bored with the repetition, so I added some 'dirt'.


I think it looks kinda cool!

Here are photos of some other things I've worked on but never posted:


And remember these?


I've been doing a whole lotta these lately....and I have two extra pizza cookie favors looking for a home!
If you want them, you gotta do one or all of the following below to win them.  They are ready to go when I get a winner!!

To enter:
1. Become a follower of Rollin' in Dough's blog, (just click the google follow link on the side bar). Leave a comment on this post saying that you are a follower, and LEAVE AN EMAIL ADDRESS so that I can contact you.  If you already follow, YIPPEE!, just leave a comment telling me so, and LEAVE AN EMAIL ADDRESS to contact you.

2. For an additional chance to win, become a fan on Rollin' in Dough's facebook page.
Leave a comment there telling me you are now a fan, come back and leave a comment and EMAIL ADDRESS telling me that you completed the task.  If you are already a fan, THANK YOU!!!, tell me so in a comment over here!

3.  For a third chance,( boy that seems like a lot to do for two cookies!!! ), post a link of this little giveaway on your fb page or blog or twitter, and let me know that you did in a comment over here.  And DON'T FORGET THE EMAIL. (I know you're tired of hearing it).

This is going to be a quickie .......entries will be accepted up until Thursday at 12 noon! 
Hurry!!


Thursday, March 17, 2011

Frosting For the Cause

I know you don't normally equate cowgirls, horses, and westerny stuff with pink, but this isn't an ordinary collection of cookies. Number one, pink is the breast cancer awareness color, and more importanly, these are special, just like my friend....


Cheryl.


 You can meet Cheryl and learn how she inspired me to create this cookie collection for my guest post today over at Frosting for the Cause,  a unique way to, in some small way, reach closer to that day when no one's loved one will have to succomb to that dirty word....cancer.
While you're there, take some time to read the posts of other cookie and cupcake makers and decorators and see how their lives have been affected by this disease, and how, like me, they're making one small, but sweet, contribution to one day finding a cure to eradicate this enemy


Wednesday, March 16, 2011

For the Girls

Life's hectic these days, people!
Waiting, and longing for the laid back, no schedule days of summer!!
Too many kid related functions going on, and too many schedules to keep up with...school, soccer, softball.  Cooking decorating time is long into the evening and early morning hours.
Today's post is about kids....cookies for some sweet girls, and  lack of time.....these were early morning specials!!  And that doesn't mean 6, or 7 a.m.!!  REAL EARLY morning specials!!  Fellow cookie decorators, you know what I mean!

These were my intrepretation of Tangled (aka Rapunzel) cookies for a little 4 year old's birthday.


I had all intentions of making several of the character cookies, but after one, and when I looked at the clock.......face cookies, became locks of hair cookies! 


I haven't seen the movie yet, I'll wait till it comes out on DVD.  But, I just love the horse's expression!  I bet he steals the show!

Also today, something else for the girls.....

Cheerleader Cookies!!

And a cheerleader cookie bouquet.....


Be sure and visit Frosting for the Cause tomorrow, March 17, as I will be guest posting about a special friend and some special cookies that were inspired by her.
You will notice that I have their button on my sidebar.  Go check them out today, and see all of the fabulous bakers who are baking a difference in the war on cancer. 

Tuesday, March 8, 2011

Pizza Cookie How To

After making this 'how to' while decorating a couple of batches of pizza cookies, I developed a new-found appreciation for bloggers who make tutorials  regularly.  It goes without saying that it is A LOT OF WORK!!  Photographing every step along the way is waaayy time consuming!  The results are fabulous, but the process is tedius and lengthy to say the least!  Kudos to all of you bloggers who provide us with these tutorials!!

So, let's get to the 'how to' in making these:


The size of each slize of pizza is about 3"x3.5".  As hard as it is to believe, I don't own a triangular shaped cutter in the 900+  cookie cutter collection I possess. (Yes, the # is correct, it's not a typo!)
So, instead of hand cutting all those triangles, I improvised....... and used these two cutters......


Both get the job done, but 1 of them involves cutting and piecing together and takes a little more time. 

Let's look at the rectangle first.........
This is the cutter and method I used on the plate of cookies pictured at the beginning of this post.  After cutting the shape out, it requires the use of a knife, or what I found easier to use, a pizza cutter, to get your triangle shape.
Use the excess piece of dough you cut away to make a crust shape.  Attach the crust to the top of the pizza cookie (pic. 4) and trim the sides cleanly with your cutter.


One day while searching for another cutter, I came across the ice cream cutter and thought it would streamline the process.  It did!!


After cutting out the shape, manipulate the crust to make it look like 'crust'.  Trim edges with pizza cutter or knife to get a clean edge.


After baking and cooling, outline and flood the crust.  Using a stiff icing, in the same color as the crust, and a #1 tip, add little 'crumbs' to the crust after waiting a few minutes for the flooding to start to set.


Next, comes the sauce.
Add the pizza sauce adjacent to the crust and hit and miss around the edges and the middle of the cookie.  You will want to add more around the edges than in the center.  If you don't have a real slice of pizza handy for color reference, use whatever is handy......


.....like a jar of pizza sauce!  I think it's close enough!


Add mozzarella cheese in the open areas of the pizza....


....and letting the cheese ooze down the sides for the melted cheese effect.


Add  the finishing details of pepperoni, green peppers, and individual shreds of cheese. 

Now, as you bite into this cookie, your mind will be telling you that you will be tasting cheese, pepperoni, pizza sauce, and green peppers. But your tastebuds will have something else to say.....like "Say what!!!??? Sweet, buttery, vanilla almond cookie?????"

ENJOY!


Tuesday, March 1, 2011

Pizza and Party Birds


First the party birds......that's what I've named them anyway.
Was asked to make some birthday cookies for a bird lover and this is the inspiration I used.........the cupcake decorating kit.
Isn't it just the cutest thing in the way of cupcake decorations!!  There are all kinds of cutesy, cupcakey, and party kinds of things on this site:
So that is where the inspiration for these came from.


Next up....pepperoni pizza cookies. These were birthday party favors for a child's pizza themed birthday celebration.  This was the first time I tried doing pizza cookies and I must admit they were quite fun to make!  I particularly enjoyed the fact that my lines didn't have to be straight and perfect.  It was sort of like coloring outside of the lines!!
The creativity juices began flowing on these and they were oh so fun to make!

I actually added an extra piece of dough to make the crust more realiatic.
I have to say I haven't enjoyed a set of cookies lately quite like these!!


Stayed tuned for a tutorial on these .....soon!!

 
Blog Design by Deluxe Designs